Why are we working differently in school this year?
This year school is a bit different from last year. This is because we have to separate ourself from most students and teachers, as we need to listen to the governments rules. This is weird and different to all of us and that is because in all our lessons we have to sanitise our hands before and after the lessons, we have to be collected for all our lessons by our teacher, we have to wear mask walking to our lessons, we have to stay in the muga and we not allowed to go to the other year groups, we can not get snacks at break, in some off our lessons we have to sit by ourself.
Choices:
Choices:
- angle
- hight
- brightness
- distances
- where to stand
- how close to be to the object
- focus
- pick the object you want to take the photo off
- zoom in
- editing
- setting
- colour
- you need to decide if you want the flash on
- pick what size you want the photo
- pick back ground
- pick what you want to use camera app on your phone/camera
My instruction:
Take a picture of a leaf
Here is the picture that I took:
WWW: |
EBI: |
|
Write about what worked well here..
|
Write about what could have been better here...
|
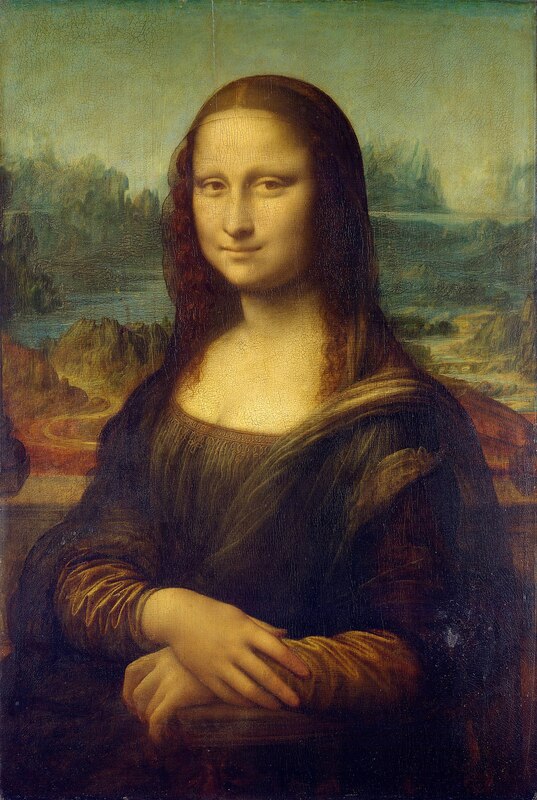
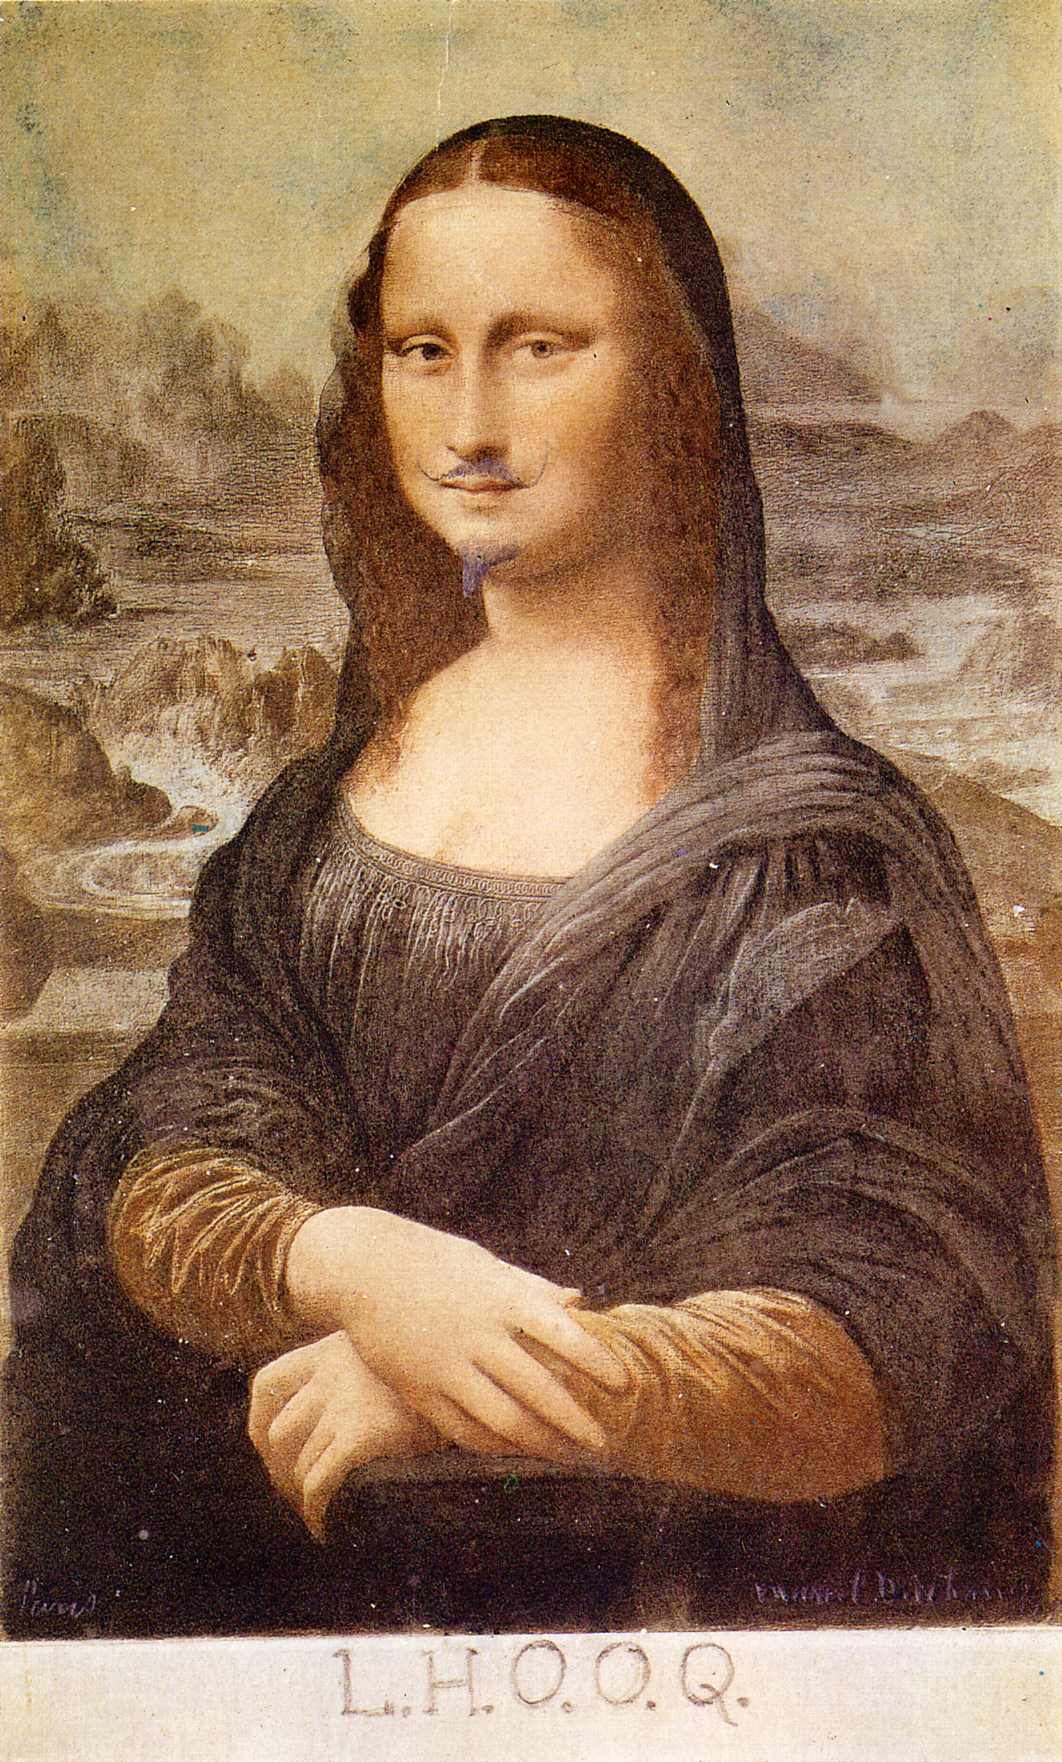
Marccl Duchamp & the Readymade
|
|
Leonardo painting is of Mona Lisa but a different version. It has a little goat beard and a mustache. This is a famous painting because of the quote at the bottom of the painting “L.H.O.O.Q”.
This writing means that she has a fine behind. He might of added male facial hair because he wanted to have his own version of the Mona Lisa but he wanted it different to the normal one. The term readymade is to describe the work of art made from manufacture objects. L.H.O.O.Q is a readymade because La Joconde instantly became his most famous readymade and a symbol for the international Dada movement, which rebelled against everything that art represented, particularly the appeal to tradition and beauty. Duchamp’s idea of the readymade has influenced a lot of artists e.g. Kensuke Koike. |
Kensuke Koike
Kensuke Koike is an artist. He gets other people's work and makes it into his own. For his work he cuts art work apart and puts them in other pictures. His work is loved by many people. Kensuke uses other peoples art work to make his own which is why i am studying his work. This is some of his work.


My Readymade Experiments 1:


WWW: |
EBI: |
|
I got a really good finished product.
|
If i made it more inspiring.
|
Hannah Höch and 'The Beautiful Girl'
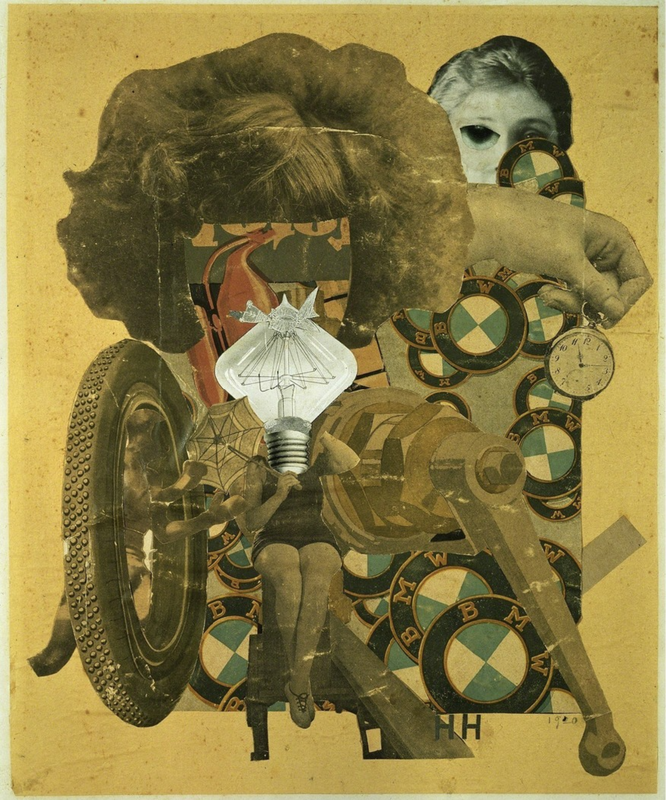
Hannah Höch - Das schöne Mädchen (The Beautiful Girl), 1920
In this picture I can see many small objects like, a light bulb, a small hand holding pocket watch, a wheel, BMW car badges, a hair wig, someone’s head and legs. It also looks like there is a cat jumping through the wheel. In my opinion the most important part of the image is the wheel and this is because if you look closely it looks like a cat is jumping through it (which is quite strange). Everything that is not human in the picture looks like it is a part of a machine or looks like a part of a car that has been disassembled into little pieces and mixed with a human body.
The title “The beautiful girl” suggests a girl or a woman dressed up with long hair from a magazine who is getting ready for a party. But this collage is of a woman in pieces mixed with car parts. In my opinion a better title would be “The mixed person”.
The three words I would choose to describe this image are:
The three questions I would like to ask the artist are:
The title “The beautiful girl” suggests a girl or a woman dressed up with long hair from a magazine who is getting ready for a party. But this collage is of a woman in pieces mixed with car parts. In my opinion a better title would be “The mixed person”.
The three words I would choose to describe this image are:
- Crowded - The picture is really packed with small objects,
- Strange - The woman has a light bulb as her head. There is one hand coming out of her hair.
- Confusing - Parts of a car and a woman are mixed together.
The three questions I would like to ask the artist are:
- Why did you choose a woman and a car to mix with each other?
- How long did it take you to plan this collage?
- Did you plan this idea yourself or with some help?
Matt Lipps:


Matt Lipps is an American photographer and artist. He has a BFA in photography from California state university, he took his BFA in 1983. His work is in the permanent collections of the getty. Matt was born in 1975 Oakland, California, he now lives and works in Los Angeles. In 2004 he earned a MFA in studio arts from a university called, university of California Irvine. He has been focusing on the relationship between photography and sculpture for this past decade.
Hannah Hughes:

In this photo, it looks like paper or card has been folded in all different places. This piece of card or paper look like they have been curved in different places and shaped weirdly.
I think this work was made by, folding, cutting and shaping paper or card in all different places and shapes. I think this was hand made, because if you look closely the piece of paper or card are overlapping each other.
Im not to sure what skill or habit Hanna Hughes used to make this work. i think she used sculpture and a folding technique for this work.
What 3 words would you choose to describe this work?
- Creative
- Imaginative
- Confusing
What 3 questions would you like to ask the artist about the work?
How long did the art work take?
Was the idea made up already or did you make it up?
What was other peoples reactions?
My 3D photosculpture
Tabletop sculpture


In this piece of homework, we had to make a sculpture out of objects around us. For this pice of workI got a collage coloured pice of plastic and put it in front of some scrunched up paper. Then I put a flash above the work pice of work to make it reflect.
Collaborative Instruction-based photo collage
In this task we had to take 5 images and do different things to them and swap them with others. Put the ones we ended up with, together
Collaborative (Physical) Collage InstructionsYou will need a pair of scissors, a glue stick, a camera phone, a piece of A3 cartridge paper and a magazine (containing interesting photos).
- Cut or tear out 5 pages from your magazine. Choose pages with interesting images.
- Make a pile of these 5 pages on your desk.
- Take the top page and cut a hole in it (Note: it doesn't have to be perfect).
- Pass this cut out image to your neighbour (the person sitting nearest to you in class).
- Put the page with the hole in it at the bottom of your pile.
- Take the (new) top page and tear it in half. Pass one half to your neighbour (the same one as before) and put the other half at the bottom of your pile.
- Take the (new) top page and cut out a shape (Note: you could cut round an object or simply cut a random shape of your own choosing).
- Keep the cut-out shape, putting it at the bottom of your pile, and pass the page that remains to someone 3 places away (Note: make sure you don't end up with your own page).
- Take the (new) top page and tear a strip from the (top or bottom) edge. Keep the strip and pass the remaining page to someone else in the room.
- Place the A3 sheet of cartridge paper in front of you (portrait format).
- Without altering them, arrange the pieces of paper from your pile on the A3 sheet to create a pleasing collage. Carefully photograph your first arrangement.
- Again, without altering them, repeat this process, re-arranging the various elements on the A3 sheet until you are happy with the results. Photograph carefully.
- You may now swap 1 or 2 elements with your neighbour. Make a new arrangement and photograph carefully.
- You may now adapt the pieces in any way you like - cutting, tearing etc. Make a new collage, this time sticking them to the A3 sheet of cartridge paper.
- Photograph your finished collage carefully.
- On your Make Do and Mend web page add the title Collaborative Instruction Collage.
- Copy and paste this list of instructions.
- Add a Gallery and upload the images you have taken today of your collages.
- Write a brief evaluation (WWW/EBI) reflecting on what it was like to make a collage by following instructions and how you feel about the results.
- If you complete all of this, experiment with importing the photographs of your collages into Photoshop and experiment with manipulating them using the various tools available. Remember to take screen shots (Cmd + Shift + 4, then draw a box) of the process so you can also add these to your webpage. Also, remember to save the resulting images as Jpegs (File > Export > Save for Web, select Jpeg High) and add them to your website.
Photos I used to make my collages


My collage


Prison Photography
|
|
Write about the film here...
|
The Prison Photography of Nicoló Digiorgis
Write about this project and book here and add captions to the pictures below...


Genre Photography Treasure Hunt
I decided to make a some photographs using a list of instructions:
- The view through a window
- Your reflection in a shiny surface
- The back of someone’s head
- A small object shot from a low angle against a plain background
- The palm of someone’s hand with the word ‘help’ written on it
- A smile
- A plant growing in the wrong place
- A cracked paving stone
- A pile of clothes
- The creases in a bed sheet shot from above (with nothing else included)
- A close-up photograph of a computer, phone or television screen
- A map
- The spine of a book
- The inside of a fridge
- The sky
- Part of a fork
- The sole of a shoe
- The ceiling of your bedroom as you are lying on the floor
- A photograph of a photograph
- A glass of water
Google street view virtual trip


collaborative GSV project- venice,Los Aangeles.
Today i had to take photos of signs.


